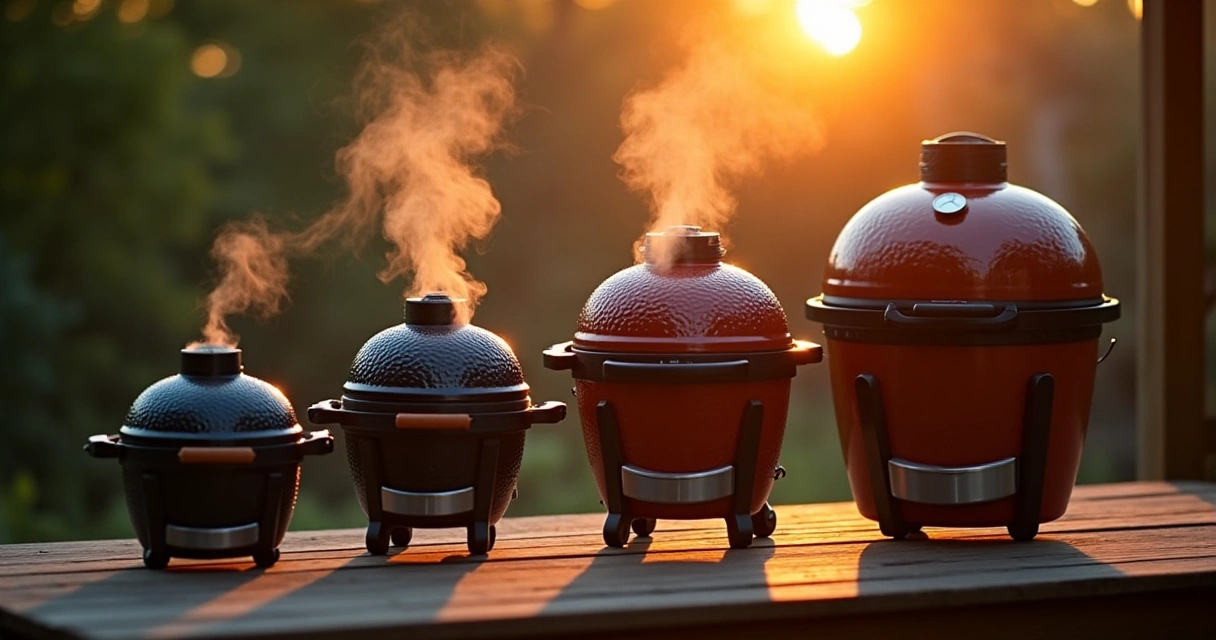
How To Control Temperature On A Charcoal Grill
You want control on a charcoal grill? Good — that’s half the battle. I’ve spent years chasing steady temps, reliable gear, and bark that’ll make neighbors jealous. In this roundup I’ll cut through the nonsense: which lid gauges actually read true, when a stainless charcoal heat controller turns your kettle into a smoker, and when you need an automated fan and probes to babysit a 12-hour brisket. Remember: mastery comes from good gear and real fire.
⚡ Quick Answer: Best Bbq
Best for Weber owners: QuliMetal 60540 67031 Grill Thermometer Replacement for Weber Charcoal, GS4 Spirit II & I 200/300, Q Series, 7581 Accurate Temperature Gauge for Weber Spirit E/S 210, 220, 310 Grill, 1-13/16" Dia
$11.69 — Check price on Amazon →
Table of Contents
- Our Top Picks in Detail
- Main Points
- Charcoal Heat Controller for Most Weber 22'' Kettle Charcoal Grill,BBQ Whirlpool for Nexgrill Charbroil 22 in Kettle XL Kamado/Big Green Egg,Stainless Steel BBQ Charcoal Grill Accessories
- BBQ Temperature Controller Kit, Inkbird WiFi & Bluetooth Automatic Smoker Fan Controller, 3 Meat Probes & 1 Oven Probe, Build-in 5.0m/S High Efficient Fan for Ceramic Smokers, Kamado, Vision Grill
- Skyflame Charcoal Heat Controller for 22”/26” Kettle Grills, Stainless Steel BBQ Smoking Gilling Kit with Ceramic Heat Deflector Plate - U.S. Design Patent, Turns Your Charcoal Grill Into a Smoker
- Escali AHG1 Stainless Steel Direct Grill Surface Thermometer, Searing Temperature Zones 100-500F Degree Range NSF Certified
- Factors to Consider
- Frequently Asked Questions
- Conclusion
Our Top Picks in Detail
Affiliate disclosure: if you buy through these links, we may earn a commission at no extra cost to you.

Weber Original Kettle Premium Charcoal Grill, 22-Inch, Copper – Outdoor BBQ Grill with Built‑In Thermometer, Heat Control Dampers & One‑Touch™ Cleaning System
$249.0Check Price →This is the pick to look at first if you want a reliable, well-rounded option that handles everyday use without unnecessary compromises. Weber Original Kettle Premium Charcoal Grill, 22-Inch, Copper – Outdoor BBQ Grill with Built‑In Thermometer, Heat Control Dampers & One‑Touch™ Cleaning System delivers solid performance across the features that matter most in this category.
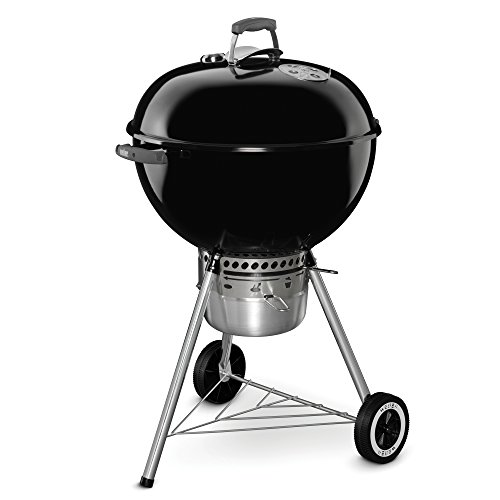
Weber Original Kettle Premium Charcoal Grill, 22-Inch, Black – Outdoor BBQ Grill with Built‑In Thermometer, Heat Control Dampers & One‑Touch™ Cleaning System
$219.0Check Price →If the top pick doesn't quite fit your situation, Weber Original Kettle Premium Charcoal Grill, 22-Inch, Black – Outdoor BBQ Grill with Built‑In Thermometer, Heat Control Dampers & One‑Touch™ Cleaning System is worth a close look as a capable alternative that still covers the essentials well.

Weber Original Kettle Charcoal Grill, 22-Inch, Black – Classic Outdoor BBQ Grill with One‑Touch™ Cleaning System & Precise Temperature Control Dampers
$149.0Check Price →For buyers who want the most for their money without sacrificing the features that actually matter, Weber Original Kettle Charcoal Grill, 22-Inch, Black – Classic Outdoor BBQ Grill with One‑Touch™ Cleaning System & Precise Temperature Control Dampers is the practical choice at this price point.
Main Points
- Match the thermometer to the job: the QuliMetal 1-13/16" dial is a direct lid-replacement for many Weber Spirit and charcoal models for quick pit-side reads, while the Escali stainless surface thermometer is built for searing zones (100–500°F) and gives you immediate contact accuracy at the grate.
- Passive vs active airflow control — passive stainless charcoal controllers (Charcoal Heat Controller, Skyflame) are rugged, simple, and great for turning 22"–26" kettles into smokers with a ceramic deflector; the Inkbird Wi‑Fi/Bluetooth fan wins when you want lock‑step temp control and remote monitoring for long smokes.
- Fit matters — measure your lid/damper openings. The QuliMetal lists specific Weber models; the heat controllers are sized for 22" and 26" kettles and advertise compatibility with Kamado/Big Green Egg/Nexgrill/Char‑Broil, but check mounting style before you buy.
- Build for real heat — stainless steel bodies and ceramic deflectors resist warping and creosote; the Inkbird’s high‑efficiency fan (5.0 m/s) and multiple probes (3 meat + 1 oven) add precision but require protection from weather and ash.
- Buy for the result you want: pick a passive controller + deflector for low‑and‑slow simplicity, or go Inkbird if you need tight automated control and probe telemetry; combine a reliable lid gauge with a surface thermometer for perfect sears. And don’t forget — gear helps, but mastery comes from good gear and real fire.
Charcoal Heat Controller for Most Weber 22'' Kettle Charcoal Grill,BBQ Whirlpool for Nexgrill Charbroil 22 in Kettle XL Kamado/Big Green Egg,Stainless Steel BBQ Charcoal Grill Accessories
This stainless-steel Charcoal Heat Controller earns the "Best universal-fit charcoal controller" spot because it actually tames the chaos on most 22" kettles and many kamados without tinkering or fabricating parts. It clamps into place, creates a focused whirlpool of airflow, and gives you repeatable, steady temps — not guesses and swings. For $52.99 and a 4.7-star crowd, it’s the simple mechanical trick that turns a kettle into a serious cooking tool.
What you get in real grills: thick 304 stainless construction that won't warp under long cooks, a precision-adjustable damper for small airflow tweaks, and a universal collar that slides into many lids cleanly. In practice that means fewer charcoal additions, less temperature babysitting, and tighter smoke control for anything from low-and-slow brisket to hot sear steaks. Install is quick — clamp, index, and you're controlling oxygen, not praying at the vents.
Buy this if you run a 22" kettle, have a kamado with a compatible collar, or you want pro-level airflow without electronics. It's for backyard pitmasters who prefer mechanical reliability over gadgets: competition practice, weekend butchers of brisket, or anyone who wants consistent temps for long smokes. It’s also a smart upgrade if your factory damper leaks or is flimsy.
Real talk: it’s not a digital controller — no temp probe, no Wi‑Fi, no PID magic. Sometimes non-standard lids need a little trimming or shimming to seal perfectly. And while stainless holds up, the swivel mechanism can pick up carbon build-up over years of heavy use; plan to clean it occasionally to keep the adjustment smooth.
✅ Pros
- Universal fit for most 22" kettles
- 304 stainless resists heat and corrosion
- Precise, repeatable airflow adjustment
❌ Cons
- No integrated digital thermometer
- May need minor fit adjustments
BBQ Temperature Controller Kit, Inkbird WiFi & Bluetooth Automatic Smoker Fan Controller, 3 Meat Probes & 1 Oven Probe, Build-in 5.0m/S High Efficient Fan for Ceramic Smokers, Kamado, Vision Grill
It earns the "Best Smart WiFi controller" spot because it marries true automation with the kind of hands-off control you want on a charcoal rig: WiFi & Bluetooth connectivity, three meat probes plus an oven probe, and a built-in 5.0 m/s high-efficiency fan tuned for ceramic smokers and kamados. For about $89.35 you get automated air control that actually moves enough oxygen to hold steady temps instead of babysitting a vent with tongs all night — that’s why it ranks here despite a 4.1-star average.
Under the hood it’s simple and effective. The app lets you set temps, monitor three pieces of meat plus chamber temp, and the controller spins the fan to chase whatever curve you program. The fan is punchy enough for Big Green Egg–style cooks, and the multiple probes mean you can run brisket on one probe, ribs on another, and still watch ambient chamber temp. In practice that equals cleaner smoke, steadier bark development, and fewer middle-of-the-night panic dumps.
If you’re a kamado or ceramic smoker owner who wants to go from manual venting to true automated control, buy this. It’s for pitmasters who run overnight briskets, multi-probe pork shoulders, or anyone converting a charcoal grill into a predictable smoker without wiring up a full-blown PID rig. It’s budget-friendly for a tech-enabled controller and gives tangible improvements to cook consistency.
Be honest: the app can be finicky on some networks, and the single built-in fan — while powerful — won’t replace a custom multi-fan shop setup. Probe cable length and weatherproofing aren’t best-in-class, so plan your placement accordingly. Still, for the price and features it’s a high-impact tool. Mastery comes from good gear and real fire.
✅ Pros
- WiFi + Bluetooth remote control
- 3 meat probes + 1 oven probe
- Built-in 5.0m/s high-efficiency fan
❌ Cons
- App connectivity can be finicky
- Single fan limits complex multi-zone control
Skyflame Charcoal Heat Controller for 22”/26” Kettle Grills, Stainless Steel BBQ Smoking Gilling Kit with Ceramic Heat Deflector Plate - U.S. Design Patent, Turns Your Charcoal Grill Into a Smoker
This kit earns "Best for converting to smoker" because it does exactly that—clean, mechanical, repeatable. The Skyflame heat controller and ceramic deflector turn a 22" or 26" kettle from a direct-sear furnace into an indirect-smoking chamber that holds smoke against the meat. No jury-rigging, no balancing bricks; you get a true low-and-slow environment with one simple install. At $54.89 and a 3.8-star crowd rating, it’s a pragmatic buy for cooks who want smoker results without buying a second cooker.
What you get: a stainless steel ring that isolates charcoal, a ceramic heat deflector that blocks direct radiant heat, and a footprint built for standard kettles. In practice that means steadier temps, fewer flare-ups, and smoke that hangs where it matters. Use it with the snake or minion methods and you’ll see 225–275°F more consistently. Toss in wood chunks or chunks of fruitwood and you’ll get real bark and smoke penetration, not just a hint of flavor. The stainless ring resists warping and cleans up with a wire brush; the ceramic plate takes the radiance so your meat never cooks over coals.
Buy this if you own a 22" or 26" kettle and want to smoke ribs, pork shoulder, chicken, or small briskets without a whole new smoker. It’s for the backyard pitmaster who values portability and cost-efficiency — and for the tinkerer who enjoys dialing vents and charcoal arrangements. Don’t expect the precision of a dedicated, baffled chamber used in competition rigs, but do expect repeatable, flavorful results on weekend long cooks.
Drawbacks: the fit can be fussy on older or non-standard kettles, and the ceramic plate isn't indestructible — drop it and you’ll cry. Airflow control still relies on your vents and charcoal technique; this kit helps, it doesn’t automate. Overall: excellent conversion tool with practical limits. Remember—mastery comes from good gear and real fire.
✅ Pros
- 304 stainless steel construction
- Ceramic deflector stabilizes low-and-slow heat
- Fits 22" and 26" kettle grills
❌ Cons
- Limited fine-tune airflow control
- Ceramic plate can chip if mishandled
Escali AHG1 Stainless Steel Direct Grill Surface Thermometer, Searing Temperature Zones 100-500F Degree Range NSF Certified
This little dial earns the "Best for searing temperatures" badge because it tells you, plain and simple, when the grates are hot enough to make a crust. The Escali AHG1 sits directly on the cooking surface so you measure the metal temperature where the meat actually meets the fire — not ambient air. With a 100–500°F range and marked searing zones, it’s the kind of brutally honest feedback every charcoal cook needs to nail a consistent sear on steaks, chops, and cast-iron workhorses.
Build is straightforward and purposeful: stainless steel face and stem, NSF certification, and a bold analog dial that shows searing bands instead of useless decimal points. In the real world that means faster decisions at the pit — you can tell if you’ve got a roaring sear or just hot coals pretending to be greatness. It’s cheap ($12.95), rugged, and easy to wipe down after a night of smoke and oil. No batteries, no fuss, just a direct read where it matters: on the grates.
Who should buy it? Grillers obsessed with crust and control — backyard pros who sear over high heat, kamado users dialing ring zones, burger flippers chasing the perfect char. It’s also smart for anyone who wants repeatable results without spending on a fancy infrared gun. Put it on the grate before you throw meat down and you’ll stop guessing and start searing with intention.
Fair warning: this is a surface thermometer, not an internal probe. Don’t try to use it for smoker temps or meat cores. The dial isn’t as precise as a lab meter — it tells zones, not tenths of a degree — and the small face can wash out in bright sun. Still, for one low-cost tool that directly tells you when the grates are ready, it punches above its weight. Mastery comes from good gear and real fire.
✅ Pros
- Direct surface readings for true grate temperature
- NSF-certified stainless construction
- Clear searing zones up to 500°F
❌ Cons
- Not for internal meat temperatures
- Analog dial less precise than digital
Factors to Consider
Vents and Dampers — control is in the openings
Look for large, easy-to-adjust top and bottom vents that move smoothly and hold position; tiny stamped holes won’t cut it. A big bottom intake with a sliding damper gives you rapid oxygen control for bursts of heat, while a well-designed chimney damper fine-tunes long cooks. Metal thickness and quality matter — stainless or heavy-gauge steel won’t warp under repeated thermal shock. If the vents feel flimsy, you’ll be chasing temps every cook.
Built-in Thermometer and Probe Options
Don’t trust toy gauges — aim for a grill with a quality analog thermometer or, better yet, a lid port for a wired probe and space to use a dual-probe digital monitor. Built-in gauges are convenient but often off by 10–30°F; verify with a calibrated probe. Make sure the lid has a tight seal around the thermometer and a port for a probe — that’s how you watch grate temp and meat temp simultaneously. Accurate feedback lets you make precise damper moves instead of guessing.
Size, Grate Layout, and Two-Zone Capability
Pick a grill that gives you at least one dedicated area for direct searing and one for indirect cooking — two-zone setups are non-negotiable for temperature control. Consider grate material: heavy stainless or cast iron holds heat and smooths temperature swings, while thin wire grates cool quickly. Match grill size to your typical load; too small and you jam the fire, too large and you waste fuel. Look for a cookbox depth that allows stacking charcoal and placing a water pan without crowding.
Coal Type Compatibility and Fuel Access
Some grills favor lump charcoal (fast, hot burns) while others work better with briquettes for steady, predictable heat. Buy a grill that gives easy access to add charcoal mid-cook — side doors or removable charcoal trays save time and keep the lid closed. If you plan long smokes, choose a grill designed for fuel banking or that accepts chunk additions without major temperature swings. Practical fuel access beats clever features when the meat’s on the line.
Ash Management and Build Durability
A chewable rack and ash pan that seals will make long cooks simple and keep airflow consistent; loose ash smothers oxygen and kills your temp. Heavy-gauge steel, welded seams, and replaceable parts extend service life — ignore a thin, rust-prone shell. Look for easy ash cleanup, replaceable grates, and robust handles/hinges that won’t sag after a season. You want a grill built to be fixed and used, not thrown away.
Frequently Asked Questions
How do I set up a reliable two-zone fire on a charcoal grill?
Bank the coals on one side for direct heat and leave the other side charcoal-free for indirect cooking; arrange coals in a mound or a snake depending on duration. Use a drip pan under the indirect side to stabilize temperatures and catch fat. Adjust the bottom intake to feed the fire and use the top vent to fine-tune exhaust — open more for higher heat, close a bit for steadier roasts.
Should I use lump charcoal or briquettes for temperature control?
Lump burns hotter and responds fast — great for quick sears and surge control. Briquettes burn more uniformly and for longer stretches, which makes them better for low-and-slow stability. I keep both on hand: briquettes for steady smokes, lump for when I need a temp bump or a screaming sear.
How often should I adjust the vents during a long smoke?
Once you dial in your initial airflow, expect to make small vent tweaks every 15–45 minutes early on, then only minor adjustments as the charcoal settles. Big changes are for big problems — use small, deliberate nudges. If you're opening the lid to adjust coals frequently, you’re losing more heat than you gain; work the vents first.
Can I use a water pan to stabilize temperature?
Yes — a water pan adds thermal mass and evens out spikes, which helps during long cooks or when ambient temps swing. Place it over the indirect side and keep it topped off; it won’t suddenly stop a runaway fire, but it will smooth short-term fluctuations. For very precise temps I still rely on airflow control and good fuel management first.
Why does my built-in thermometer read lower or higher than my probe?
Lid-mounted thermometers measure air near the lid, not grate or meat temperature, so differences of 10–30°F are normal. Calibrate with an accurate probe at grate level before you rely on the gauge for long cooks. If the built-in is way off, plan to use a separate dual-probe digital monitor for the job.
How do I keep my grill temperature steady for 6–10 hours?
Use a large bank of briquettes or the snake method with lump/briquette mix, control the intake to limit oxygen, and keep the top vent mostly open for exhaust. Replenish small amounts of fuel through a side port or char tray without dumping cold air on the coals. Patience and incremental adjustments win long cooks — don’t panic and throw on a fistful of cold charcoal.
How often should I clean ash and why does it matter?
Empty ash after every few cooks or after a long smoke; too much ash blocks the bottom vents and chokes airflow. Clean grates and check for rust or warped parts seasonally so the grill responds predictably. A clean firebox is a controllable firebox — simple as that.
Conclusion
Control starts with the right hardware: sturdy vents, accurate probes, two-zone grates, and a solid ash system. Buy gear that holds up to heat and gives you predictable airflow — then practice the moves until they’re muscle memory. Mastery comes from good gear and real fire.